Posts Tagged: Toning
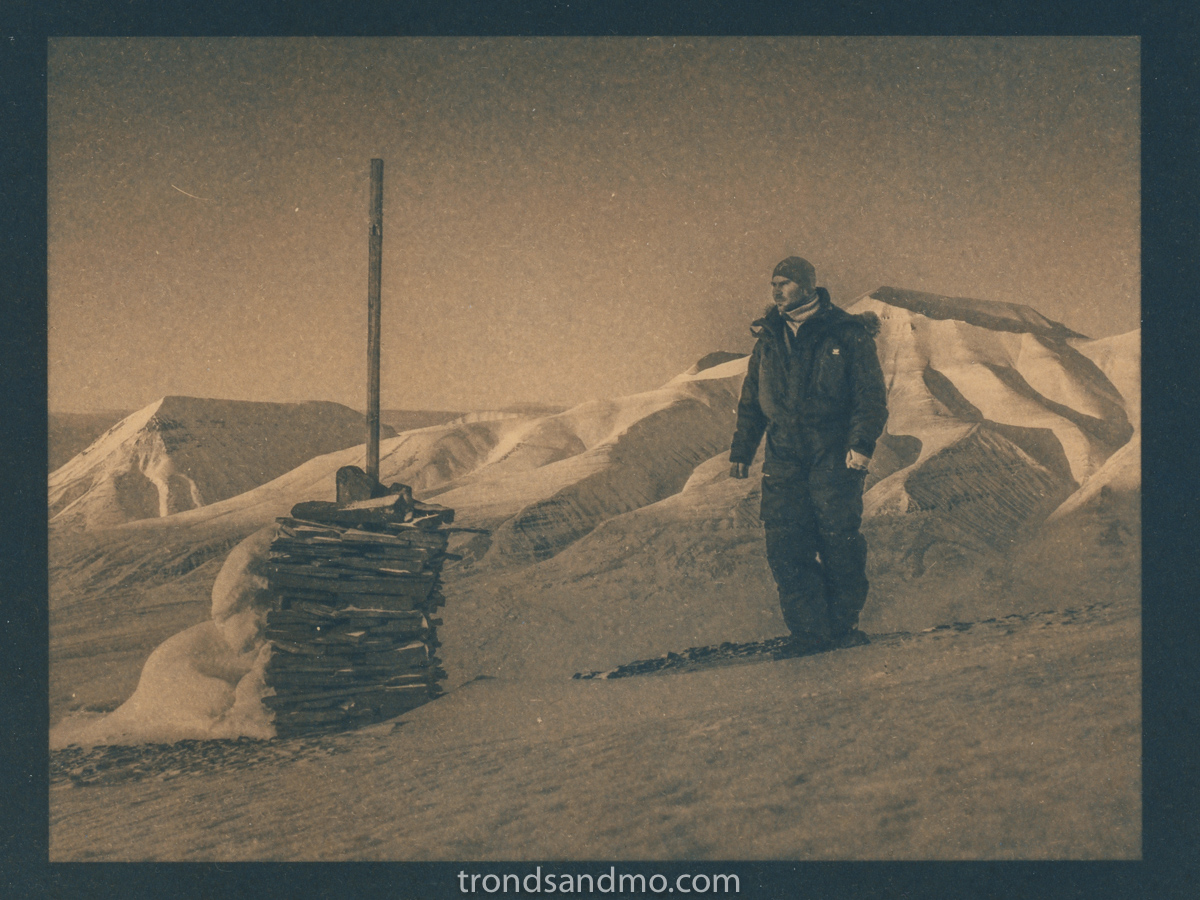
Testing coffee toning
I have done another toning test similar to the tea toning test I did before Christmas. I used the same concentration of washing soda for bleaching and the same type of watercolour paper (Arches satin hot pressed 300g).
The recipe is as follows:
Bleach bath: 1 teaspoon Sodium Carbonate (washing soda) for each liter hot water. I mixed up 3 liters.
Toning bath: 3 tablespoons instant coffee (Nescafe gold) for each liter hot water. Also 3 liters in total.
Cool down the bleach and toning bath to room temperature before starting the process. I have been precise when it come to the timing. Especially with the bleach bath. A few seconds longer or shorter time submerged in bleach will produce a noticeable difference in the result. I might consider using a lower concentration on the bleach. I think it should make it easier to get the best result. Golden in the highlights and purple in the shadows is what I try to achieve. Another important ting is the pre-soaking in water (1 minute) and thoroughly cleanse between bleach and toning.
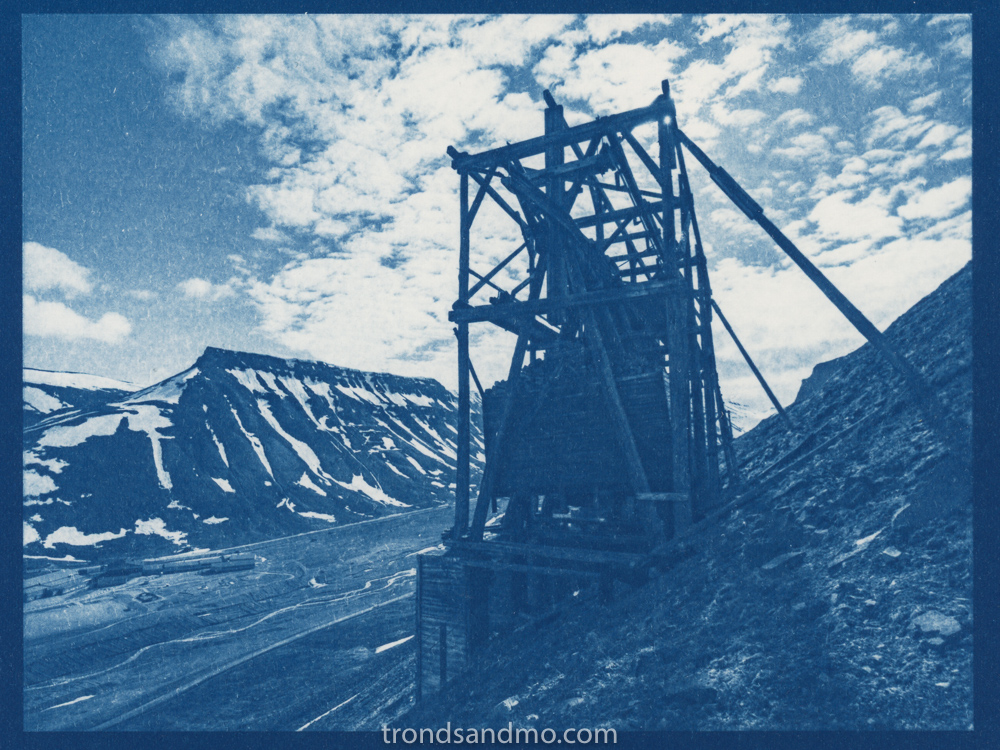
The original:
Tea toning cyanotype print
If you like the simple process (and low price!) of cyanotype printing, but wish not everything was bluish. Why not try toning your prints! You will be surprised how different the print appears. This time I have decided to tone my prints in black tea. It is said that it produces a warm black/brown shade! In my opinion the image below came out best:
Mixing ratio and preparations:
- Bleach bath is one teaspoon Sodium Carbonate (washing soda) for each liter hot water.
- Toning bath is 5 teabags per liter hot water. (about 10g black tea)
- Cool the bleach and toning bath to room temperatures before you start the process.
- Rinse bath is cold tap water.
The process:
- Pre soak the cyanotype print in cold water for about one minute.
- Submerge the print in the bleach solution for the selected time.
- Start rinsing in cold water just before the print has bleached enough. (the print will bleach a little after rinse has started)
- Tone the bleached print for the selected time.
- Rinse in cold water
- Dry. I dry mine flat on paper towels. Image side up.
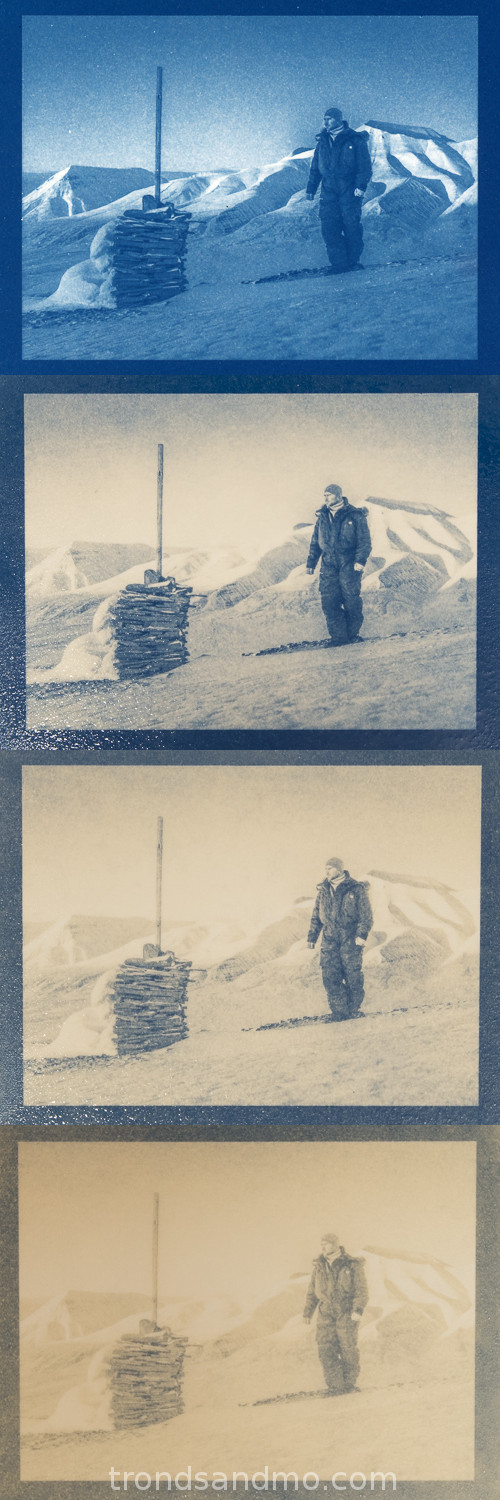 In the image to the right you can study how far I bleached the print. On the top you see the dried original from the flatbed scanner. Number two is briefly bleached. Only 15 seconds. Number tree is bleached for 30 seconds, and the last one for 60 seconds. After the bleach bath I rinse the print in water for at least one minute. If you bleach on eye measure, start rinsing in water a little before you think it is bleached enough. Remember the print will continue bleach for a while after you have removed it from the bleach bath. Photo of the bleached prints were taken when still wet. Sorry about the glare.
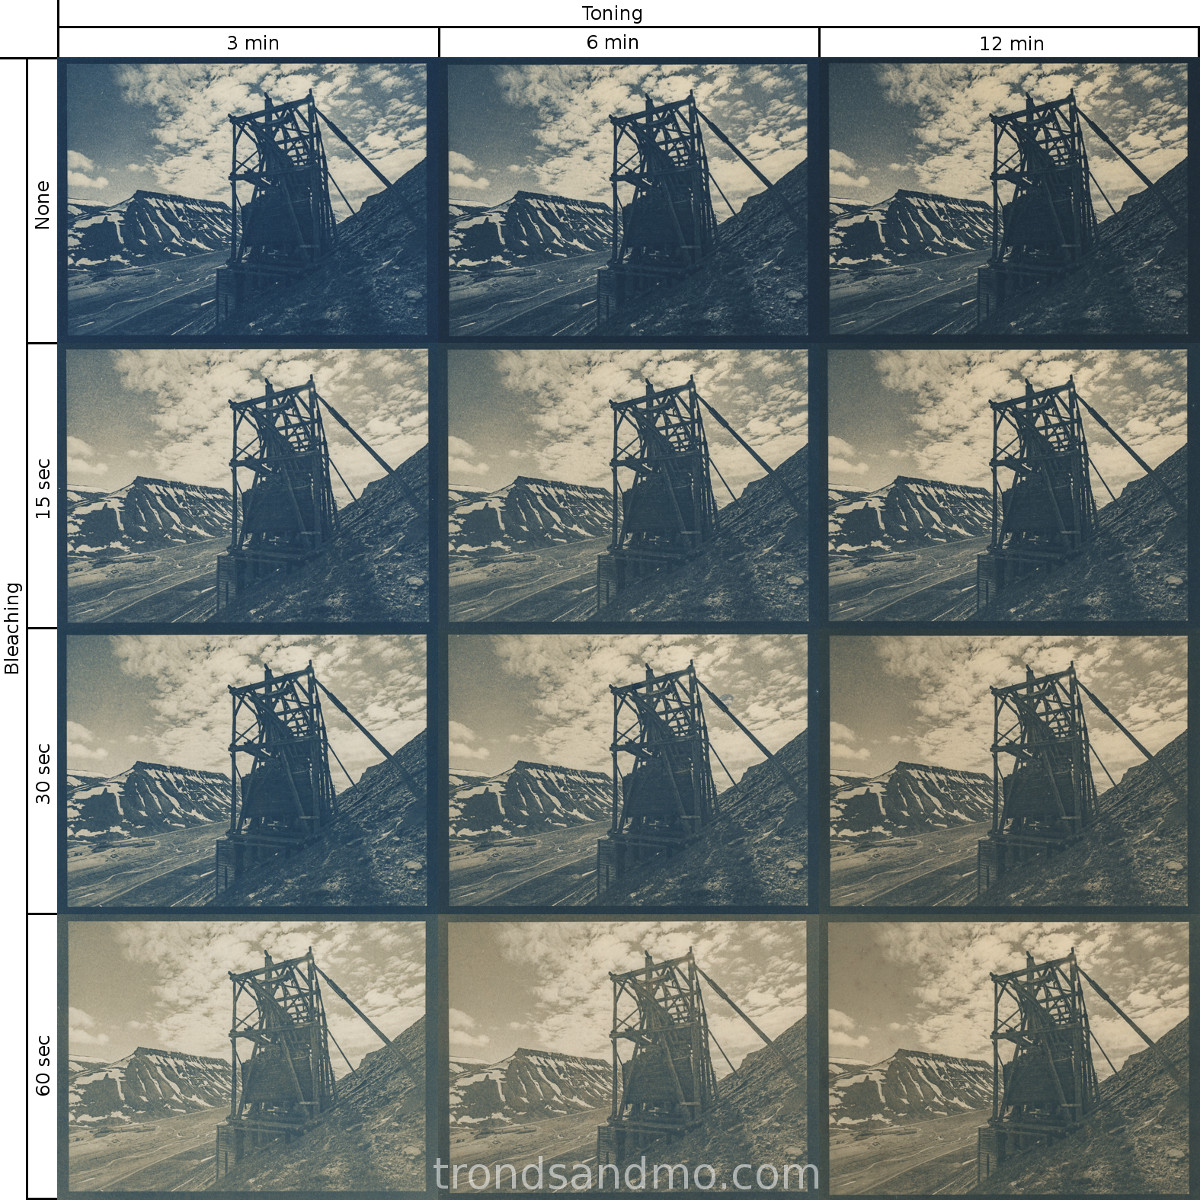
Bleaching and toning cyanotype prints is a bit tricky. There are many variables; paper quality, under/over exposed image, bleaching time and toning time. All those variables are essential for a successful result. My best advise is to experiment with several prints. The result will vary, and do not judge the print before you have seen it dried. I performed some pre tests before I completed this one, and found my paper to stain a lot with long toning baths. The print was completely ruined after 20 minutes, and I decided 12 minutes toning was enough for this test. Another make of paper might produced better (or worse) result.
The result:
Out of twelve cyanotype prints, bleached and toned differently I have this result:

From the result I see that the none bleached prints ends up too dark blueish. And the longest bleached prints is a little washed out. I think the best one is number 6; 15 seconds bleach and 12 minutes toning. The darkest parts are black and warm brown in the highlights without looking washed out.
In this test I used Arches hot pressed 300g watercolor paper, Lipton Yellow Lable tea, and Stabil krystall soda (Sodium Carbonate). And of course tap water from Longyearbyen 🙂