Posts in Category: Photography
Working with salt print
 By coincidence I stumbled over a youtube video that inspired me to examine the old alternative printing techniques more closely. Salt print was the first photographic printing technique I heard about. Ironically it is also the first photographic printing technique ever invented beating the Calotype/Talbotype with two years.
Salt print was the most popular photographic print technique in the middle of the 19 century (1839-1860). In the dark room, silver nitrate solution was brushed on to a salted paper (standard table salt, sodium chloride). This led to a chemical reaction between the silver and salt, creating the light sensitive silver chloride. Once dry, the paper with the negative were put together in a contact printing frame and exposed to sunlight. When the exposure was ended, the print were stabilized in a strong solution of salt. And a final wash in hypo (sodium thiosulfate) made the print light-fast.
 In Norway, most chemicals are really hard to purchase. For example silver nitrate in crystalline form is will not be sold to a private person. It is different for a registered business. This is probably so to prevent people against misuse, however it does not make it easy for a wannabe print expert with good intentions. Luckily I found a salt print kit that is legally sold here. I guess that the concentration of the chemicals is that makes it legal or illegal. Unfortunately the kit says little about what it exactly contains, and it gives me some trouble during the process.
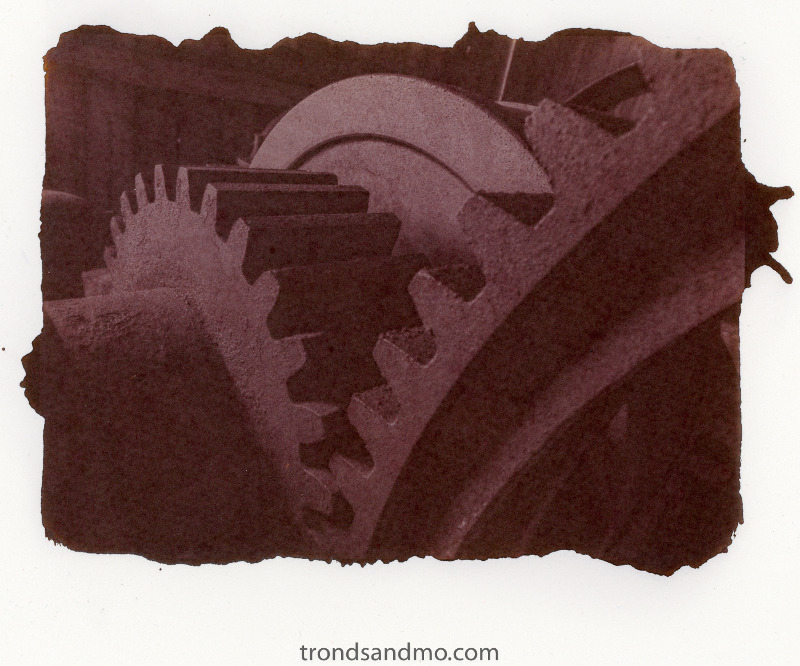
If I was to implement the method completely authentic, I had to have access to a daguerreotype negative or similar. I have not, so I choose to create a more modern photographic negative. In Lightroom and Photoshop I convert the selected image to black and white. Then I invert the picture and makes a horizontal flip. The last step is to print the image to a transparent foil with an inkjet printer.
 The problem with this kit is primarily lack of information on what the chemicals contain. Both silver solution and stabilizes / toner missing this important information. It is described that the different toners / stabilizers gives brown, red and blueish look, but nothing more. I choose to instead use ordinary hypo giving a brownish tone. When it comes to the choice of paper, I think hot pressed satine aquarel paper gave me the best results. I see from the prints I made that bright parts are too dark. Whether this is because I am a bad editor in photoshop or salt print technique is not better I do not know.
If I got hold of pure silver nitrate I would not used it in standard salt print. I rather go for the album print technique. That technique is much like the original salt print, however using egg white in addition to salt. It is told that the print is ON the paper not IN the fibers of the paper (which is the case with salt print). It will be a much better results.
Well, at the moment I am out of the silver solution provided with the kit. So I think I have made the last salt print. It was interesting, but not a technique for a high quality photo print.
DIY Pinhole II
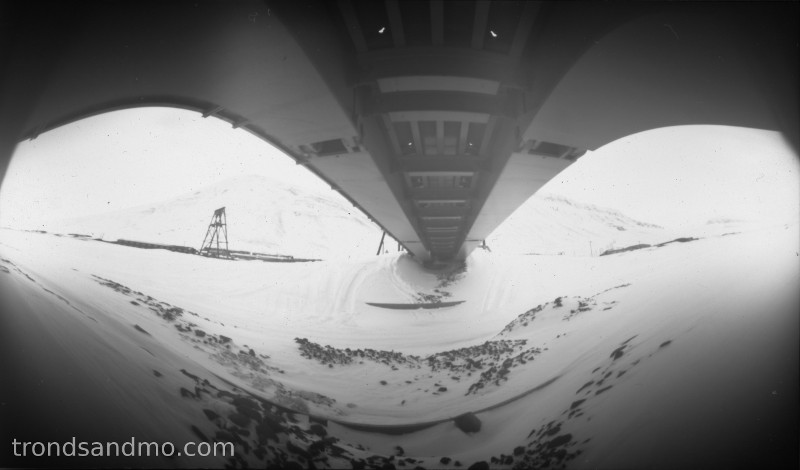
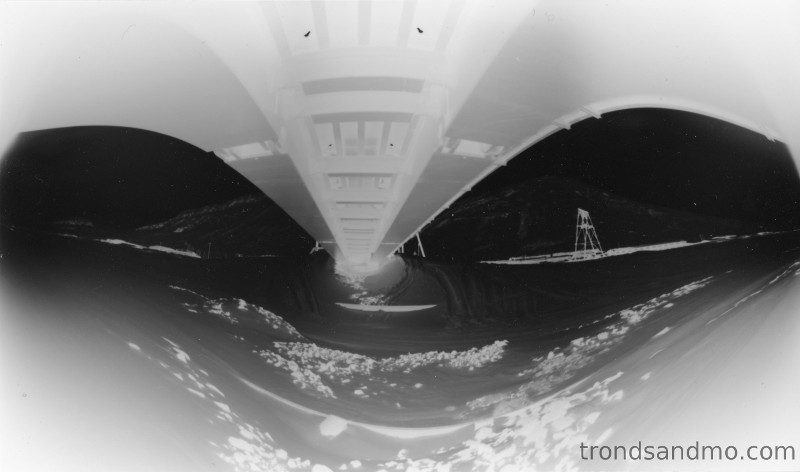
 A pinhole photo made inside a rectangular box will make no lens distortion, wide angle images remain absolutely rectilinear. However if you want a more distorted look to the pinhole photo, why not try out a pinhole camera made from a coffee can! The left and right side of the image looks stretched while the center is normal.
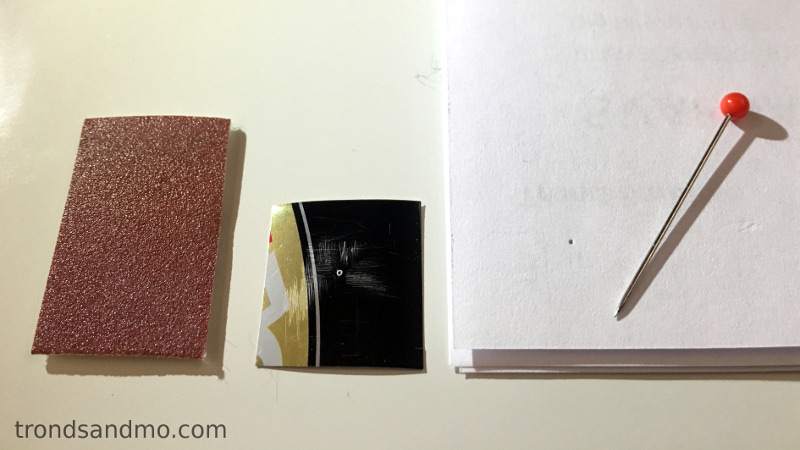 Create the pinhole. Like the box-camera, I made the pinhole with a thin piece of aluminum (from a beer can) and the diameter size is 0.3mm in diameter. A standard needle will make a hole to big and the picture will not appear sharp. So I experimented a little… By only using the tip of the needle against a hard surface and a few sheets of paper between I was able to punch a hole smaller than the needle itself. Sanding down the edges is important!
Add photographic paper. In the darkroom, slide a photographic paper inside the can (with size 10×17 cm for this coffee can). The light sensitive side of paper should be facing the pinhole. The lid should be light proof, and remember to cover the pinhole with a black tape. The coffee can was shiny on the inside, so I used black spray paint to eliminate reflections.
The rest of the process (exposure timing, development and more) is the same as for the box pinhole camera. You can read the DIY Pinhole I there 🙂
This is how the coffee can pinhole photo looks like:
Hello world
Every blog needs a first post.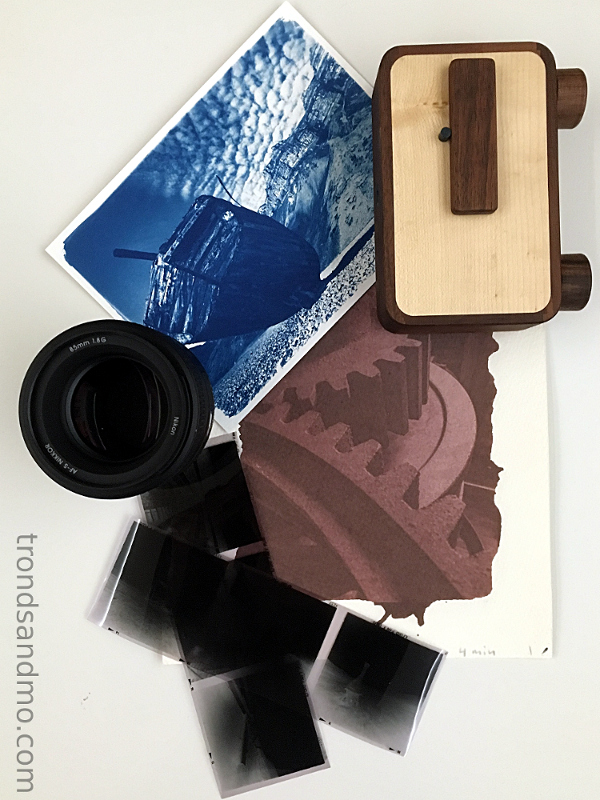
For a long time I have been wondering about what to do with my website trondsandmo.com. Till now the website has just contaied some of my photos and not much more. So what should I upload? Pictures and prints? My thoughts in a blog? Videos? The Internet is full of artists portfolios and everything seems to be for sale. Is it a success for people? Could I do something different? I don`t know exactly, but I will try to post something out there!
Photography has been a hobby of mine for years, and I have spent a lot of time doing it without a goal to reach for. That is going to change! With this blog I hope to become a better photographer. I want to learn analog photography, and master old alternative printing techniques. I hope that by becoming more active and by sharing my progress here in the blog will speed up my learning curve.
Well, for the time, these are my thoughts about this website. It will primarily contain photography related material, however other topics might be covered. Time will show!
I am not a professional photographer. This is my hobby, and I do it for personal development. Just for fun.
-trond